Exposing your instance via CloudFlare Tunnel
With a couple of edits to the docker-compose.yml file, we can expose Dawarich to the internet utilizing CloudFlare and their Zero Trust Tunnel service. This will not require any firewall configuration nor ports being opened at the firewall level.
This guide will assume you already have a public domain, and are using CloudFlare DNS nameservers.
Login to CloudFlare, and navigate to “Zero Trust” on the left hand menu. Cloudflare One Dashboard
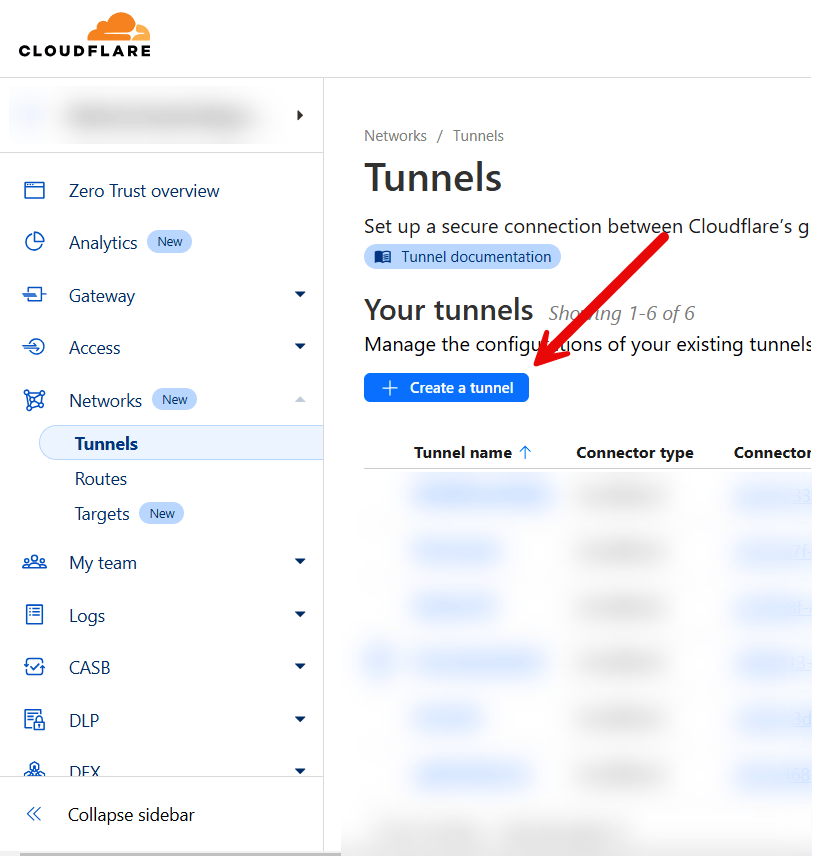
Click on Networks, and then the submenu “Tunnels”.
Create your tunnel.
Select cloudflared for the tunnel type on the next page.
Give your tunnel a name, and click “save tunnel”.
On the next page - we are provided with the token needed to run our connector. Click on the copy button to copy this to your clipboard.
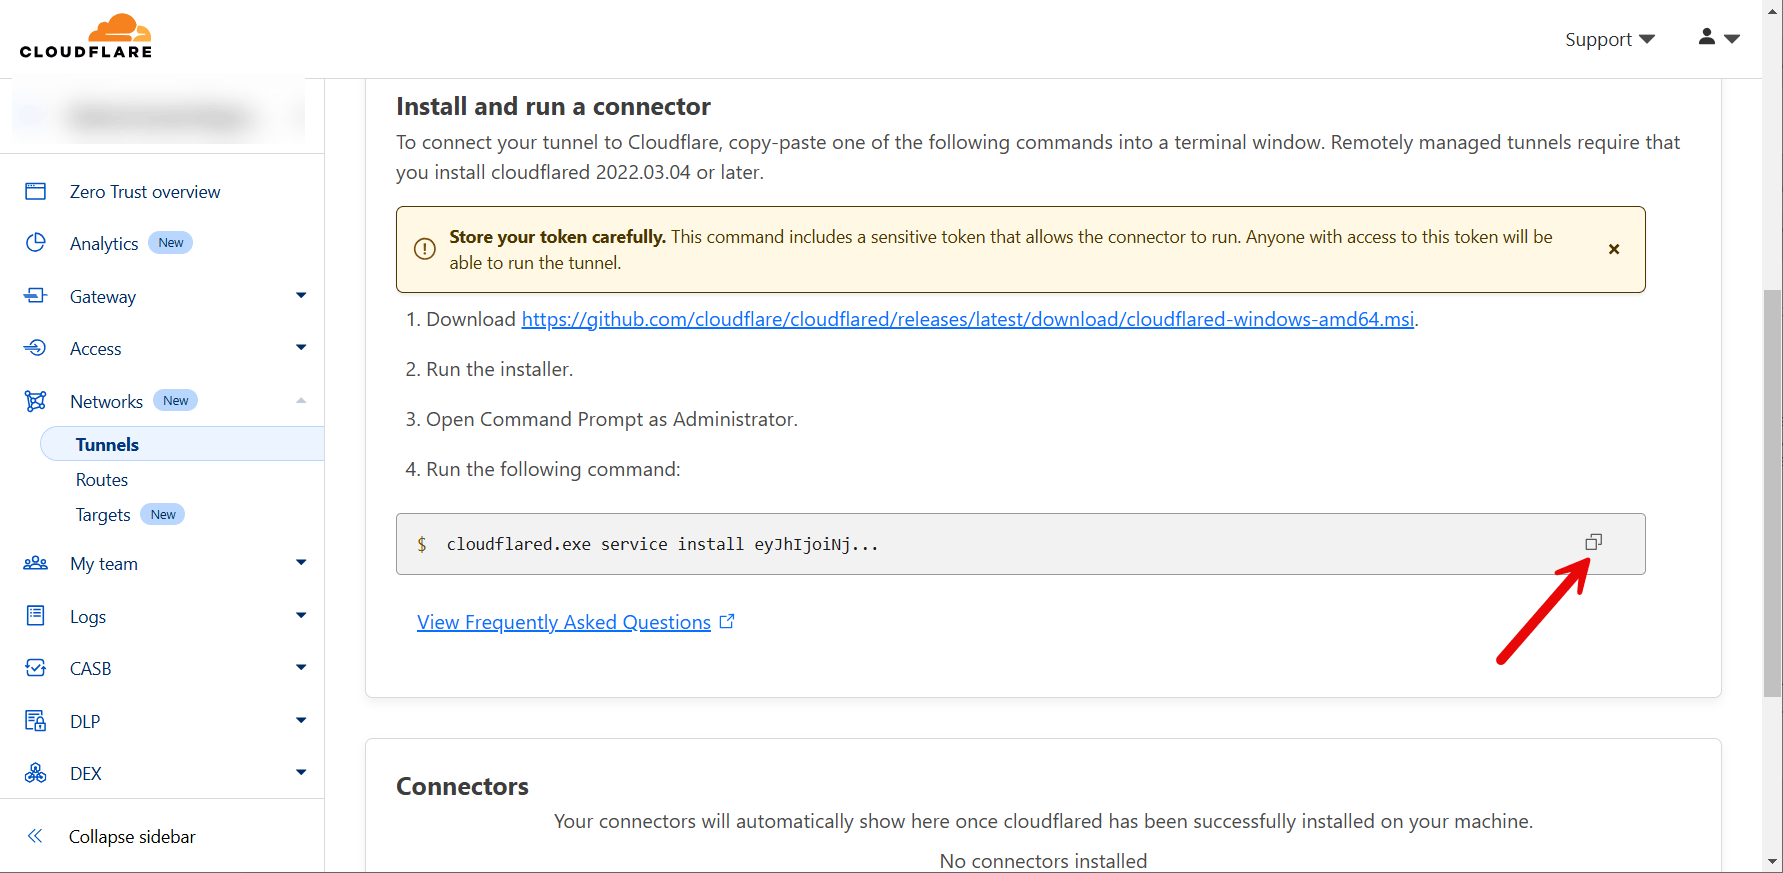
Paste this into a text editor to clean this up. We can remove the install commands, we don’t need them. We just want the tunnel token. We will come back to the token in just a moment. Let’s finish CloudFlare’s configuration.
Click on the Public Hostname tab, and click “add a public hostname”
You can use any subdomain you’d like. Make sure to configure the IP address and port Dawarich is running on.
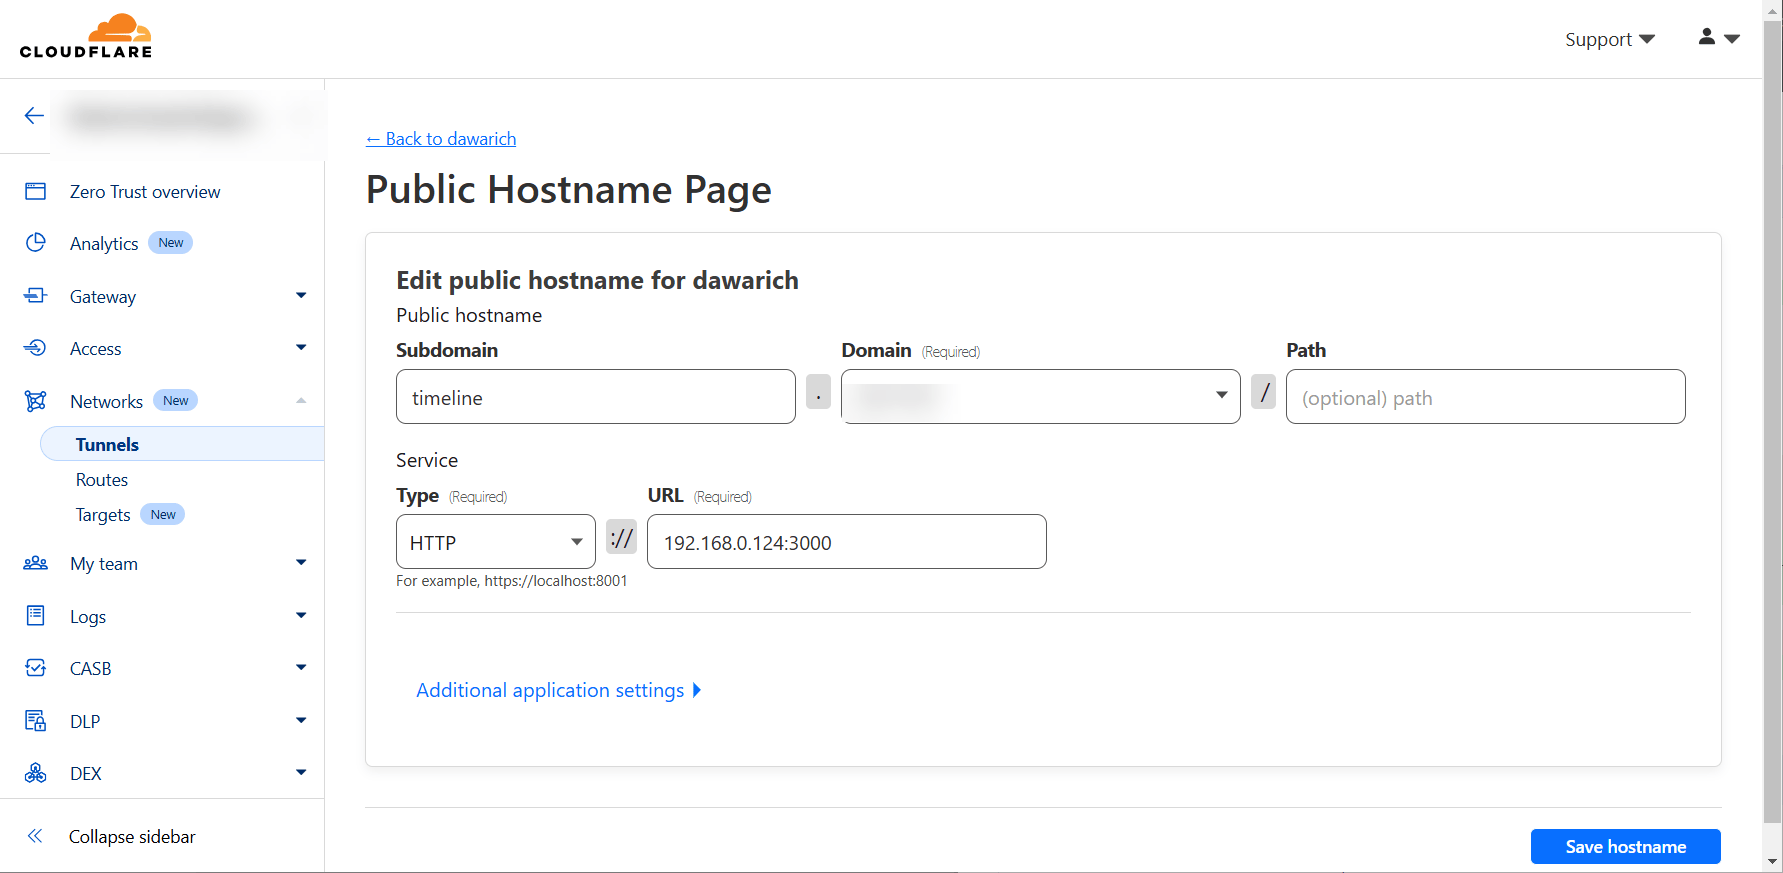
If you are adding the tunnel into the docker-compose file provided by dawarich, you can alternatively set the URL in the hostname to: dawarich_app:3000
Storing the token
.env file?
If you are using a custom .env file for your Dawarich configuration, add the variable to it like this:
TUNNEL_TOKEN=CLOUDFLARE_TUNNEL_TOKEN
directly in docker-compose.yml
see section: Adding the tunnel
Changing the docker-compose file
Now - we are ready to modify our docker-compose file.
We need to modify the dawarich_app and dawarich sidekiq.
In both instances, add RAILS_APPLICATION_CONFIG_HOSTS to the environment of dawarich_appand dawarich_sidekiq so that the environment parts look like this:
      RAILS_APPLICATION_CONFIG_HOSTS: "" #add this
      RAILS_ENV: development
      REDIS_URL: redis://dawarich_redis:6379
      DATABASE_HOST: dawarich_db
      DATABASE_USERNAME: postgres
      DATABASE_PASSWORD: password
      DATABASE_NAME: dawarich_development
      MIN_MINUTES_SPENT_IN_CITY: 60
      APPLICATION_HOSTS: dawarich.YOURDOMAIN.TLD #set this to your domain
      TIME_ZONE: Europe/London
      APPLICATION_PROTOCOL: http
      PROMETHEUS_EXPORTER_ENABLED: "false"
      PROMETHEUS_EXPORTER_HOST: 0.0.0.0
      PROMETHEUS_EXPORTER_PORT: 9394
      SELF_HOSTED: "true"
      STORE_GEODATA: "true"
For the APPLICATION_HOSTS, you can add " around the domain, if you plan to use multiple hostnames. Separate them with a comma.
Adding the tunnel
Add the following towards the end of the dockerfile, right above where the volumes are defined:
  tunnel:
   image: cloudflare/cloudflared:latest
   command: tunnel --no-autoupdate run
   networks:
    - dawarich
   restart: always
   container_name: tunnel
   depends_on:
    - dawarich_app
If you are using a .env file, you need to add
env_file: .env # or whatever you named the environment file
into the tunnel section.
Should you instead want to add the token directly into the compose file, add
environment:
      TUNNEL_TOKEN=YOUR_TOKEN_HERE
into the tunnel section.
(Re-)Starting the stack
Finally - execute a
docker compose up -d
Your instance should now be accessible via your public host name.
You can connect applications on mobile devices to utilize the API while away from home for better tracking. Tested on Android using OwnTracks.
The original guide is written by @mattmichaels and can be found here.
It was later updated by @WorldTeacher in collaboration with @Sevvlor. The respective changes can be viewed here.